CCNA基础实验
实验 1:Cisco 路由器基础配置
实验 2:配置路由器接口及可变长子网掩码(VLSM) --2 实验 3:配置静态路由、默认路由与 RIP(路由信息协议)--7 解析 RIP、IGRP、EIGRP 与 OSPF --9
配置带有 4个子网的有类网络 --12
配置一个典型的不连续网络 --14
实验 4. 配置一个由 3类地址构成的网络 -17
实验 5:配置 EIGRP的手动汇总- --19
配置存在多个地区的OSPF --20
基础实验之配置虚拟局域网(VLAN) --22
实验6: 配置 1900与 2900交换机共享VTP信息 --25 使用访问控制列表 --31
实验7: 网络地址转换(NAT) --35
实验8: 帧中继网络 --39
实验9: 配置PPP封装和认证 --43
实验 1:Cisco 路由器基础配置
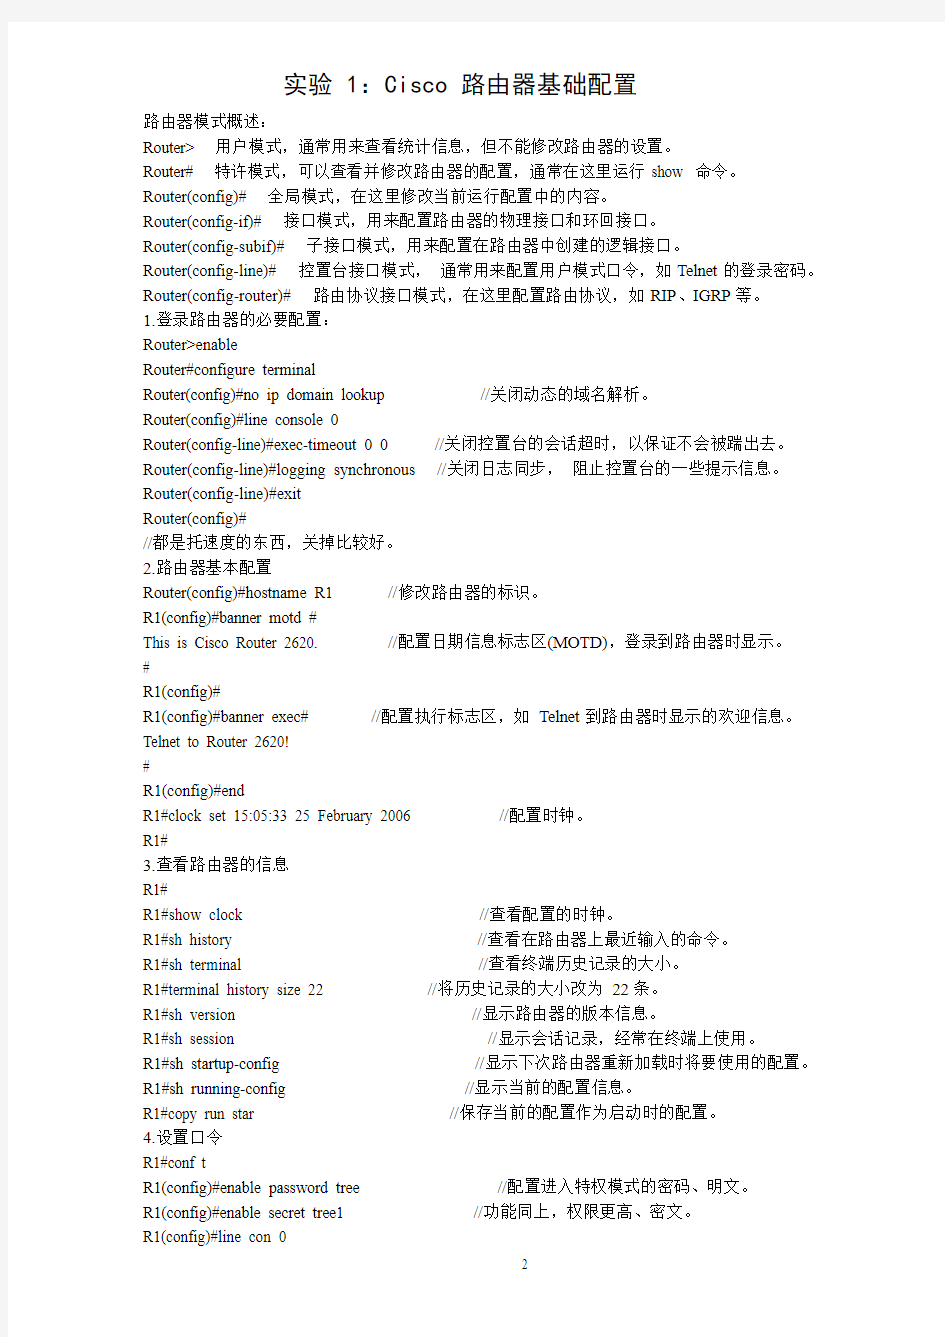
路由器模式概述:
Router> 用户模式,通常用来查看统计信息,但不能修改路由器的设置。
Router# 特许模式,可以查看并修改路由器的配置,通常在这里运行show 命令。
Router(config)# 全局模式,在这里修改当前运行配置中的内容。
Router(config-if)# 接口模式,用来配置路由器的物理接口和环回接口。
Router(config-subif)# 子接口模式,用来配置在路由器中创建的逻辑接口。
Router(config-line)# 控置台接口模式,通常用来配置用户模式口令,如Telnet的登录密码。Router(config-router)# 路由协议接口模式,在这里配置路由协议,如RIP、IGRP等。
1.登录路由器的必要配置:
Router>enable
Router#configure terminal
Router(config)#no ip domain lookup //关闭动态的域名解析。
Router(config)#line console 0
Router(config-line)#exec-timeout 0 0 //关闭控置台的会话超时,以保证不会被踹出去。Router(config-line)#logging synchronous //关闭日志同步,阻止控置台的一些提示信息。Router(config-line)#exit
Router(config)#
//都是托速度的东西,关掉比较好。
2.路由器基本配置
Router(config)#hostname R1 //修改路由器的标识。
R1(config)#banner motd #
This is Cisco Router 2620. //配置日期信息标志区(MOTD),登录到路由器时显示。
#
R1(config)#
R1(config)#banner exec# //配置执行标志区,如Telnet到路由器时显示的欢迎信息。Telnet to Router 2620!
#
R1(config)#end
R1#clock set 15:05:33 25 February 2006 //配置时钟。
R1#
3.查看路由器的信息
R1#
R1#show clock //查看配置的时钟。
R1#sh history //查看在路由器上最近输入的命令。
R1#sh terminal //查看终端历史记录的大小。
R1#terminal history size 22 //将历史记录的大小改为22条。
R1#sh version //显示路由器的版本信息。
R1#sh session //显示会话记录,经常在终端上使用。
R1#sh startup-config //显示下次路由器重新加载时将要使用的配置。R1#sh running-config //显示当前的配置信息。
R1#copy run star //保存当前的配置作为启动时的配置。
4.设置口令
R1#conf t
R1(config)#enable password tree //配置进入特权模式的密码、明文。
R1(config)#enable secret tree1 //功能同上,权限更高、密文。
R1(config-line)#password tree //设置登录到路由器的密码,出现在进用户模式之前。
R1(config-line)#login //启用登录。
R1(config-line)#line vty 0 4 //为Telnet 访问路由器设置5条线路0-4。
R1(config-line)#pass tree //设置Telnet 到路由器的密码,如果不设置Telnet
R1(config-line)#login 服务将无法启用。
R1(config-line)#line aux 0
R1(config-line)#pass tree //设置辅助接口密码。
R1(config-line)#login
R1(config-line)#end
R1#
R1#sh run //查看配置。
R1#conf t
R1(config)#service password-encryption //加密口令
R1(config)# Ctrl+Z //end、exit、Ctrl+Z 为三种退出命令。
R1#sh run //显示结果,口令以被加密。
R1#logout //退出控置台,验证密码配置,也可使用exit。//路由器上的输出:
5.取消密码
R1#conf t
R1(config)#no enable password
R1(config)#no en secret
R1(config)#line con 0
R1(config-line)#no pass
R1(config-line)#no login
R1(config-line)#line vty 0 4 //Ctrl+A 将光标移到本行的开始位置。
R1(config-line)#no pass //Ctrl+E 将光标移到本行的末尾。
R1(config-line)#no log
R1(config-line)#line aux 0
R1(config-line)#no pass
R1(config-line)#no log
R1(config-line)#end
R1#sh run
R1#
R`#erase startup-config //删除启动配置文件。
R1#reload //重启路由器。
实验 2:配置路由器接口及可变长子网掩码(VLSM)SPOTO CCNA实验拓扑:
1.在接口上配置IP地址
配置下面这张IP地址表:
路由器接口IP地址
R1 S0 172.16.10.1/24
R2 S0 172.16.10.2/24
R2 S1 172.16.20.1/24
R3 S0 172.16.20.2/24
R1#show controllers serial 0 //显示物理接口自身的信息,通常用来察看
连接的是DTE端还是DCE端。
R1#conf t
R1(config)#interface serial 0
R1(config-if)#description Connection to R2 //接口描述,容易被遗忘的命令,在大型
网络中是一个重要的命令。R1(config-if)#ip address 172.16.10.1 255.255.255.0 //配置IP地址及子网掩码。
R1(config-if)#no shutdown //打开这个接口
R1(config-if)#end
R1# //用Ctrl+Shift+6,X组合键回到终端在进入R2
R2>en
R2#sh cont s 0
R2#sh cont s 1
R2#conf t
R2(config)#int s0
R2(config-if)#ip add 172.16.10.2 255.255.255.0
R2(config-if)#no shut
R2(config-if)#clock rate 64000 //DCE端必须配置时钟。
R2(config-if)#int s1
R2(config-if)#ip add 172.16.20.1 255.255.255.0
R2(config-if)#no shut
R2(config-if)#clock rate 64000
R2(config-if)# //Ctrl+Shift+6,X R3
R3>en
R3#conf t
R3(config)#int s0
R3(config-if)#ip add 172.16.20.2 255.255.255.0
R3(config)#no shut
R3(config)#end
R3#
2.验证配置
R2#show interface serial 0 //查看接口配置,包括硬件地址、逻辑地址和封装方式。
R2#show ip interface brief //提供包含有逻辑地址和状态的路由器接口的快速汇总,
一目了然。
R2#show protocols //查看每个端口上第一层和第二层连接情况
R2#show ip interface s0 //查看接口上一些设置的状态。
R2#show cdp neighbors //CDP思科发现协议,显示直连的相邻设备及其详细信息。R2#show cdp neigh detail //功能同上,多显示了直连接口的IP,这两个命令非常好用。R2#ping 172.16.10.1 //在路由器R2上ping 路由器R1和R3的地址,测试地址
R2#ping 172.16.20.2 配置的正确性。
假设loopback 1 连接主机数为20台,使用32的块,loopback 2连接主机数为30台,使
用64的块(32的块可用IP为30个,一个分配到路由器端口,剩下29个地址不够用)。Loopback 3 连接主机数为10台,使用16的块,中间三个路由器连接的网段分别使用2个4的块;使用C 类私有地址192.168.10.0 网段进行子网划分。
具体IP地址分配如下表:
路由器接口IP地址
R1 LO 1 192.168.10.33/27
R1 S0 192.168.10.5/30
R2 S1 192.168.10.9/30
R2 LO 2 192.168.10.65/26
R3 S0 192.168.10.10/30
R3 LO 3 192.168.10.17/28
R1(config)#int loopback 1 //增加一个环回地址,相当于多出一个可用的网段。
R1(config-if)#ip add 192.168.10.33 255.255.255.224 //注意“/27”的掩码。
R1(config-if)# //不用no shutdown,只要路由器没问题环回接口永远是UP的。R1(config-if)#int s0
R1(config-if)#ip add 192.168.10.5 255.255.255.252 //252是“/30”的掩码。
R1(config-if)#no shut
R1(config-if)#Ctrl+Shift+6,X R2
R2>en
R2#conf t
R2(config)#int s0
R2(config-if)#ip add 192.168.10.6 255.255.255.252 //在接口上重复设置IP,第二次的
R2(config-if)#no shut 设置将覆盖前一次的操作。
R2(config-if)#int loop 2
R2(config-if)#ip add 192.168.10.65 255.255.255.192 //“/26”的掩码。
R2(config-if)#int s1
R2(config-if)#ip add 192.168.10.9 255.255.255.252
R2(config-if)#no shut
R2(config-if) #Ctrl+Shift+6,X R3
R3>en
R3#
R3#conf t
R3(config)#int s0
R3(config-if)#ip add 192.168.10.10 255.255.255.252
R3(config-if)#no shut
R3(config-if)#int loop 3
R3(config-if)#ip add 192.168.10.17 255.255.255.240 //“/28”的掩码。
R3(config-if)#end //在每台路由器上执行下列命令:
R3#sh ip int brie //查看IP地址及协议状态是否良好。
R3#sh cdp neig deta //查看直连网络设备接口的IP地址。
R3#ping 192.168.10.9 // ping 过去测试网络连通性。
R3#show ip route //查看路由表,常用命令之一。
IP地址表:
路由器接口IP地址
R1 S0 192.168.10.1/24
R2 S0 192.168.10.2/24
R2 S1 192.168.20.1/24
R3 S0 192.168.20.2/24
注意:须配置完上面的IP地址并保证路由器两两都能ping通后才能进行路由协议的配置。1.配置静态路由
方法1:使用与本路由器直连的下一个路由器的接口地址进行配置。
R1#conf t
R1(config)#ip route 192.168.20.0 255.255.255.0 192.168.10.2 //配置10.0到20.0的
R1#sh ip route 静态路由。
R1#ping 192.168.20.1
R1#ping 192.168.20.2 //虽然路由器R1通告了192.168.20.0的网段,不
过目前20.2是ping不通的,因为192.168.20.2是路由器R3的接口地址,而R3在没有配
置路由协议之前路由表中并没有到达192.168.10.0网段的路径。
R1(config)#Ctrl+Shift+6,X R3
R3>
R3>en
R3#conf t
R3(config)#ip route 192.168.10.0 255.255.255.0 192.168.20.1 //配置20.0到10.0的
R3(config)#end 静态路由。R3#sh ip route
R3#ping 192.168.10.1
R3(config)#Ctrl+Shift+6,X R1
R1#ping 192.168.20.2 //验证配置,这次ping 通了。方法2:使用本路由器的出端口配置静态路由。
R1#conf t
R1(config)#Ctrl+Shift+6,X R3 IP更新时还能保证这个静态路R3> 由是有效的。
R3>en
R3#conf t
R3(config)#ip route 192.168.10.0 255.255.255.0 s0
R3(config)#end
R3#sh ip route
R3#ping 192.168.10.1
R1#ping 192.168.20.2
2.配置默认路由
选择删除R1到R3的静态路由,并在R3新建一个环回接口来测试默认路由的效果。
R3#conf t
R3(config)#int loop 0
R3(config-if)#ip add 192.168.30.1 255.255.255.0
R3(config-if)# Ctrl+Shift+6,X R2
R2(config)#ip route 192.168.30.0 255.255.255.0 s1 //创建一条R2到R3 路由器LOOP0
网段的静态路由。因为默认时路由器R2无法识别192.168.30.0网段。
R2(config)#end
R2#sh ip route
R2#ping 192.168.30.1 //测试R2到R3的静态路由。
R2# Ctrl+Shift+6,X R1
R1(config)#no ip route 192.168.20.0 255.255.255.0 s0 //删除R1到R3的静态路由。
R1(config)#end
R1#sh ip route //show的结果是在R1的路由表中只剩下直连的10.0网段。
R1#ping 192.168.20.2 //在没有配置默认路由或其他路由协议的情
R1#ping 192.168.30.1 况下这两个网段是ping 不通的。
R1#conf t
R1(config)#ip route 0.0.0.0 0.0.0.0 192.168.10.2 //默认路由的作用是:转发不在路由表
中列出的远端目的网络的数据包到下一跳路由器(在这里也就是路由器R2,192.168.10.2)。
R1(config)#end
R1#sh ip route
R1#ping 192.168.20.2
R1#ping 192.168.30.1 //ping两个远端目的网络测试默认路由。
R1#conf t
R1(config)#no ip route 0.0.0.0 0.0.0.0 192.168.10.2
R1(config)#ip route 0.0.0.0 0.0.0.0 s0 //还是推荐用出端口进行配置。
R1(config)#end
R1#sh ip route
R1#ping 192.168.20.2
R1#ping 192.168.30.1
3.配置RIP协议
R1#conf t
R1(config)#router rip
R1(config-router)#network 192.168.10.0 //通告直连的网段。
R1(config-router)#Ctrl+Shift+6,X R2
R2#conf t
R2(config)#router rip
R2(config-router)#network 192.168.10.0
R2(config-router)#network 192.168.20.0
R2(config-router)# Ctrl+Shift+6,X R3
R3(config)#router rip
R3(config-router)#network 192.168.20.0
R3(config-router)#end
R3#sh ip route
//“R”代表RIP路由,到达远程网络的路计数为1。
R3#sh ip protocols
R3#ping 192.168.10.1
R3#debug ip rip //查看路由器发送和接收的路由更新。
R3#undebug all //关闭dubug。
实验 4:解析 RIP、IGRP、EIGRP 与 OSPF SPOTO CCNA实验拓扑:
首先,必须记住一些概念以及它们的潜在关系:
1.有类的路由:即网络中所有主机(结点)都使用已存在的相同的子网掩码。
2.无类的内部域路由(CIDR):他们在某个成块的区域中提供地址,即常说的VLSM。3.不连续的网络:将两个或更多的有类网络的子网通过不同的有类网络连接在一起的网络实验要求:
在各种不同的网络环境中配置RIP、IGRP、EIGRP、OSPF 协议,通过观察路由表的输出,比较它们对各种网络环境的支持有何不同。
实验1. 配置连续网络中的无类路由。
IP地址表:
路由器接口IP地址
R1 LO0 192.168.10.17/28
R1 S0 192.168.10.5/30
R2 S1 192.168.10.9/30
R3 S0 192.168.10.10/30
R3 LO0 192.168.10.33/27
配置RIPv1
R1(config)#router rip
R1(config-router)#netw 192.168.10.0
R2(config)#router rip
R2(config-router)#netw 192.168.10.0
R3(config)#router rip
R3(config-router)#netw 192.168.10.0
R1#sh ip route
//RIPv1在路由器R1上的输出:
//对比上面两张输出表,很明显R1 学到了R2 直连的/30 的子网,而R2 里没有R1 直连的/28的子网,说明RIPv1面对连续网络的无类路由,只学习与本路由器直连网段掩码相匹配
的子网信息。
配置RIPv2
R1(config)#router rip
R1(config-router)#version 2
R2(config)#router rip
R2(config-router)#version 2
R3(config)#router rip
R3(config-router)#version 2
R1#sh ip route
//RIPv2在路由器R1上的输出:
//第一行/27就出现了,而/30也在第三行出现,说明RIPv2面对这类网络时,路由到了所有
的子网信息。
配置IGRP
R1\R2\R3(config)#no router rip \\分别在三个路由器上删除RIP。R1(config)#router igrp 10
R1(config-router)#netw 192.168.10.0
R2(config-router)#netw 192.168.10.0
R3(config)#router igrp 10
R3(config-router)#netw 192.168.10.0
R1#sh ip route
//IGRP在路由器R1上的输出:
//还是没有R3的/27,输出结果证明,IGRP和RIP一样,只学习与本路由器直连网段掩码相匹配的子网信息。
配置EIGRP
R1\R2\R3(config)#no router igrp 10
R1\R2\R3(config)#router eigrp 10 \\分别在三个路由器上配置。
R1\R2\R3(config-router)#netw 192.168.10.0
R1#sh ip route
\\在R1上查看没有关闭自动汇总时EIGRP的路由表:
\\结果同RIPv2,认到了所有的子网。
R1\R2\R3(config)#router eigrp 10
R1\R2\R3(config-router)#no auto-summay \\关闭自动汇总。
R1#sh ip route
\\结果同上,关闭自动汇总也路由到了所有的子网。
配置OSPF
R1\R2\R3(config)#no router eigrp 10
R1(config)#router ospf 110
R1(config-router)#netw 192.168.10.0 0.0.0.255 area 0
R2(config)#router ospf 111
R2(config-router)#netw 192.168.10.0 0.0.0.255 area 0
R3(config)#router ospf 112
R3(config-router)#netw 192.168.10.0 0.0.0.255 area 0
R1#sh ip route
//在路由器R1上查看OSPF 的路由表:
\\没有悬念,OSPF 路由到了所有的子网。
实验1 小结:面对连续网络的无类路由,RIPv1 与IGRP 只路由与各自路由器掩码相匹配的子网信息,而RIPv2、EIGRP、OSPF则路由到了所有的子网。
实验 2. 配置带有 4个子网的有类网络。
IP地址表:
路由器接口IP地址
R1 LO0 172.16.10.1/24
R1 S0 172.16.20.1/24
R2 S0 172.16.20.2/24
R2 S1 172.16.30.1/24
R3 S0 172.16.30.2/24
R3 LO0 172.16.40.1/24
配置RIPv1
R1/R2/R3(config)#no router ospf 110/111/112 //分别删除三台路由器上的OSPF 进程。
R1/R2/R3(config)#router rip
R1/R2/R3(config-router)#netw 172.16.0.0
R1#sh ip route
//在R1上RIPv1的输出:
//远程的两个加上直连的两个,一共四个子网,全部认到。
配置RIPv2
R1/R2/R3(config)#router rip
R1/R2/R3(config)#version 2
R1#sh ip route
//RIPv2也路由到了全部子网。
配置IGRP
R1/R2/R3(config)#no router rip
R1/R2/R3(config)#router igrp 10
R1/R2/R3(config-router)#netw 172.16.0.0 R1#sh ip route
//R1上IGRP上的输出。
//同上,路由到全部子网。
配置EIGRP
R1/R2/R3(config)#no router igrp 10
R1/R2/R3(config)#router eigrp 10
R1/R2/R3(config-router)#netw 172.16.0.0 R1#sh ip route
//路由全部子网。
R1/R2/R3(config)#router eigrp 10
R1/R2/R3(config-router)#no auto-summary R1#sh ip route
//路由全部子网。
配置OSPF
R1(config)#router ospf 110
R1(config-router)#netw 172.16.10.0 0.0.0.255 area 0
R1(config-router)#netw 172.16.20.0 0.0.0.255 area 0
R2(config)#router ospf 111 //配置OSPF 可以使多种方法。R2(config-router)#netw 172.16.0.0 0.0.255.255 area 0
R3(config)#router ospf 112
R3(config-router)#netw 172.16.30.2 0.0.0.0 area 0
R3(config-router)#netw 172.16.40.1 0.0.0.0 area 0
R1#sh ip route
//认到了所有子网,注意第一行的/32,172.16.40.1是在R3上配的一个环回地址,而OSPF
默认把环回地址作为路由器ID(RID),所以才会出现/32。
实验2小结:这应该算是一个最常见的网络之一,使用一个B类的地址但却用了一个C类
的掩码,这点很容易让人理解为这是一个无类的网络,而就像一开始说的,他们使用已存
在的相同的子网掩码/24,所以这还是一个有类的网络,而四协议对有类网络的支持是显而
意见的,它们路由到了网络中所有的子网信息。
实验 3. 配置一个典型的不连续网络。
IP地址表:
路由器接口IP地址
R1 LO0 172.16.10.1/24
R1 S0 10.3.1.5/24
R2 S0 10.3.1.6/24
R2 LO0 172.16.20.1/24
配置RIPv1
R1/R2/R3(config)#no router ospf 110/111/112
R1/R2(config)#router rip
R1/R2(config-router)#netw 172.16.0.0
R1/R2(config-router)#netw 10.0.0.0
R1#sh ip route
//只有直连的网段,路由不到远端网络,说明RIP不支持不连续的网络。
配置RIPv2
R1/R2(config)#router rip
R1#sh ip route
//注意RIPv2 的输出,路由到的是一个主类地址172.16.0.0/16,而并没有真正路由到172.16.20.0/24子网,但RIPv2可以正常工作。
配置IGRP
R1/R2(config)#no router rip
R1/R2(config)#router igrp 10
R1/R2(config-router)#netw 172.16.0.0
R1/R2(config-router)#netw 10.0.0.0
R1#sh ip route
//显然,IGRP也不支持不连续的网络。
配置EIGRP
R1/R2(config)#no router igrp 10
R1/R2(config)#router eigrp 10
R1/R2(config-router)#netw 172.16.0.0
R1/R2(config-router)#netw 10.0.0.0
R1#sh ip route
//自动汇总时,EIGRP在R1上的输出
//自动汇总将主类地址172.16.0.0/16 和10.0.0.0/8 汇总到了两个空接口(Null0)上,最终导致远程网络172.16.20.1不可达。
关掉R2的自动汇总
R2(config-router)#no auto-summary
R1#sh ip route
//关掉R2的自动汇总为R1带来了172.16.20.0/24子网,虽然这时R1依然汇总主类地址至空接口,但远程网络以经可达,网络可以正常工作。
R2#sh ip route
//在看看这时R2上的路由表
//关掉自动汇总使R2的空接口消失,并从R1路由到了172.16.0.0/16的主类地址,有路由,网络就可以正常通信。
关闭两端的自动汇总
R1(config)#router eigrp 10
R1(config-router)#no auto-summary
R2#sh ip route
//对比上面的路由输出,自动汇总完全关闭后,R2学到了172.16.10.0/24的子网地址!
配置OSPF
R1/R2(config)#no router eigrp 10
R1/R2(config)#router ospf 110/111
R1/R2(config-router)#netw 172.16.0.0 0.0.255.255 area 0
R1/R2(config)#10.3.1.0 0.0.0.255 area 0
R1#sh ip route
//和关闭了自动汇总的EIGRP一样,OSPF 路由到了子网地址。
实验3 小结:这是一个情况复杂的网络,RIPv2 在这里失去了路由到子网地址的能力,而RIP和IGRP干脆不工作了,所以任何时候,使用EIGRP和OSPF才是最好的选择。
实验 4. 配置一个由 3类地址构成的网络。
IP地址表:
路由器接口IP地址
R1 LO0 172.16.10.1/24
R1 S0 10.1.1.1/24
R2 S0 10.1.1.2/24
R2 LO0 192.168.10.65/26
配置RIPv1
R1/R2(config)#no router ospf 110/111
R1(config)#router rip
R1(config-router)#netw 172.16.0.0
R1(config-router)#10.0.0.0
R2(config)#router rip
R2(config-router)#netw 10.0.0.0
R2(config-router)#netw 192.168.10.0
R1#sh ip route
//RIP学习到了主类地址。
配置RIPv2
R1/R2(config)#router rip
R1/R2(config-router)#vesion 2
R1#sh ip route
配置IGRP
R1/R2(config)#no router rip
R1/R2(config)#router igrp 10
R1/R2(config-router)#netw 172.16.0.0/192.168.10.0 R1/R2(config-router)#netw 10.0.0.0
R1#sh ip route
//同上,学到主类地址。
配置EIGRP
R1/R2(config)#no router igrp 10
R1/R2(config)#router eigrp 10
R1/R2(config-router)#netw 172.16.0.0/192.168.10.0 R1/R2(config-router)#netw 10.0.0.0
R1#sh ip route
//学主类地址,汇总空接口。
R1/R2(config)#router eigrp 10
R1/R2(config-router)#no auto-summary
R1#sh ip route
配置OSPF
R1/R2(config)#no router eigrp 10
R1(config)#router ospf 110
R1(config-router)#netw 172.16.10.1 0.0.0.0 area 0
R1(config-router)#netw 10.1.1.1 0.0.0.0 area 0
R2(config)#router ospf 111
R2(config-router)#netw 10.1.1.2 0.0.0.0 area 0
R2(config-router)#netw 192.168.10.64 0.0.0.31 area 0 //通配符
R1#sh ip route
//OSPF 也学到了子网,192.168.10.65(RID)。
实验4小结:这是一个奇怪的网络,同时存在A、B、C三类地址,还包括可变长,但幸运的是所有协议在这样的网络里都可以进行通信。
实验 5:配置 EIGRP的手动汇总。IP地址表:
路由器接口IP地址
R1 LO0 192.168.10.33/29
R1 LO1 192.168.10.41/29
R1 S0 192.168.10.49/30
R2 S0 192.168.10.50/30
R2 LO0 192.168.20.1/24
配置EIGRP
R1/R2(config)#no router ospf 110/111
R1/R2(config)#router eigrp 10
R1/R2(config-router)#netw 192.168.10.0
R1#sh ip route
//在自动汇总打开的情况下,对比两个路由器的输出,它们都学到了所有子网地址,区别在
于,EIGRP在路由器R2上汇总了空接口。
R1/R2(config)#router eigrp 10
R1/R2(config-router)#no auto-summary
R2#sh ip route
//自动汇总关闭后,空接口消除并路由到所有的子网。
在S0接口配置EIGRP的手动汇总
R1(config)#int s0
R1(config-if)#ip summary-address eigrp 10 192.168.10.32 255.255.255.240
R1(config-if)#end //将两个8的块汇总至一个16的块中。R2#sh ip route
//在R2上查看汇总后的结果
//对比上面R2的输出,两个/29的子网被汇总成一个/28的子网通告出去了,汇总的目的是
压缩路由器上路由表的尺寸以节省内存,同时它还可以缩短由IP 搜索路由表并找到到达远
端网络路径所需要的时间。
实验 6:配置存在多个地区的OSPF
IP地址表:
路由器接口IP地址
R1 LO0 192.168.10.1/24
R1 S0 172.16.10.1/24
R2 S0 172.16.10.2/24
Cisco配置命令汇总 第一章 命令作用简便拼法 show version 检验路由器启动过程①sh ve enable 进入特权执行模式en conf t 进入全局配置模式conf (enter两次)在全局配置模式下Router(config)# hostname name 命名路由器ho +name enable secret password 设置使能密码ena s line console 0 进入console配置模式li co (config-line)#password password 配置console口密码pa +name config-line)#login 登陆logi line vty 0 4 设置远程控制接口限制li v config-line)#password 设置远程控制登陆密码pa +password (config-line)#login 登陆logi interface type number (such as f0/0 se0/0/0) 进入接口配置模式int + (such as f0/0 se0/0/0) config-if)# ip address address mask 设置接口ip地址和子网掩码ip add(删除前面加no)config-if)#description 设置描述内容de config-if)#no shutdown 开启no sh(关闭shutdown)在特权模式下(Router#) copy running-config startup-config 保存路由器更改cop run sta show running-config 查看路由器运行文件sh run show ip route 查看路由表sh ip rou show ip interface brief 查看各个接口状态sh ip int br show interfaces 查看各个接口的详细信息sh int clock rate+number 配置串行接口上的时钟信号cl ra+number show controllers+接口 (s0/0/0) 确定路由器接口连接的电缆sh co debug ip routing 启动调试功能de ip rou
CISCO命令全集-思科命令汇总 视图模式介绍: 普通视图router> 特权视图router# /在普通模式下输入enable 全局视图router(config)# /在特权模式下输入config t 接口视图router(config-if)# /在全局模式下输入int 接口名称例如int s0或int e0 路由协议视图router(config-route)# /在全局模式下输入router 动态路由协议名称 1、基本配置: router>enable /进入特权模式 router#conf t /进入全局配置模式 router(config)# hostname xxx /设置设备名称就好像给我们的计算机起个名字 router(config)#enable password /设置特权口令 router(config)#no ip domain lookup /不允许路由器缺省使用DNS解析命令 router(config)# Service password-encrypt /对所有在路由器上输入的口令进行暗文加密 router(config)#line vty 0 4 /进入设置telnet服务模式 router(config-line)#password xxx /设置telnet的密码 router(config-line)#login /使能可以登陆 router(config)#line con 0 /进入控制口的服务模式 router(config-line)#password xxx /要设置console的密码 router(config-line)#login /使能可以登陆 2、接口配置: router(config)#int s0 /进入接口配置模式serial 0 端口配置(如果是模块化的路由器前面加上槽位编号,例如serial0/0 代表这个路由器的0槽位上的第一个接口) router(config-if)#ip add xxx.xxx.xxx.xxx xxx.xxx.xxx.xxx /添加ip 地址和掩码
视图模式介绍: 普通视图ro u ter>特权视图router#/ 在普通模式下输入en abl e 全局视图rou ter(con fi g)#/ 在特权模式下输入con figt 接口视图rou ter(con fi g-i f)#/在全局模式下输入in t 接口名称例如in ts0或 in te0路由协议视图 ro uter(con fi g-rou te )#/ 在全局模式下输入ro u ter动态路由协议名称 1、基本配置: ro uter>en abl e/进入特权模式 ro uter#con ft/ 进入全局配置模式 ro uter(con fi g)#ho stn a mex xx/设置设备名称就好像给我们的计算机起个名字 ro uter(con fi g)#en abl epasswo rd/设置特权口令ro uter(con fi g)#n oi pdo ma inl ook up/不允许路由器缺省使用DN S解析命令 ro uter(con fi g)#Serv icepa sswo rd-en crypt/对所有在路由器上输入的口令进行暗文加密
ro uter(con fi g)#li n ev ty04/进入设置teln et服务模式ro uter(con fi g-l in e)#passwo rdx xx/设置teln et 的密码ro uter(con fi g-l in e)#lo gi n/使能可以登陆 ro uter(con fi g)#li n econ0/进入控制口的服务模式 ro uter(con fi g-l in e)#passwo rdx xx/要设置con so l e 的密码rou ter(con fi g-lin e)#lo gi n/使能可以登陆 2、接口配置: ro uter(con fi g)#in ts0/ 进入接口配置模式seria l0 端口配置(如果是模块化的路由器前面加上槽位编号,例如seria l0/0代表这个路由器的0 槽位上的第一个接口) ro uter(con fi g-i f)#ipa ddxx x.xxx.x xx.x xxx xx.x xx.xx x.xx x/添加ip地址和掩码 ro uter(con fi g-i f)#enca hdl c/ppp捆绑链路协议hdlc或者ppp思科缺省串口封装的链路层协议是 H DLC所以在sho wru n配置的时候接口上的配置没有,如果要封装为别的链路层协议例如 PPP/FR/X25就是看到接口下的en cappp 或者en ca fr ro uter(con fi g)#in tl oo pba ck/建立环回口(逻辑接口)模拟不同的本机网段
933a LMI使用Q933A标准.LMI(Local management Interface)有3种:ANSI:T1.617;CCITTY:Q933A和CISCO特有的标准。 # fram-relay intf-typ ABC ABC为帧中继设备类型,它们分别是DTE设备,DCE交换机或NNI(网络接点接口)支持。# frame_relay interface_dlci 110 br 配置DLCI(数据链路连接标识符)。 # frame-relay map ip ABCD XXXX broadcast 建立帧中继映射。ABCD为对方ip地址,XXXX为本地DLCI号,broadcast允许广播向前转发或更新路由。 # no shutdown 激活本端口. # exit ---- 5 .帧中继子接口的配置: # conf t # int s0.1 point-to-point
对应S0的子接口1,点对点方式。 # ip addr ABCD XXXX ABCD为子口1的IP地址,XXXX为子网掩码。# frame-relay intreface-dlci 100 br 6.配置拨号备份 (1).配置备份主口 # conf t # int s0 S0为主口. # backup int asy 1 A1口为备份口. # backup delay 0 1 延时1秒. (2).配置虚拟接口 # conf t # ip addr ABCD XXXX
ABCD为虚拟接口IP地址,XXXX为子网掩码。 # encap ppp 封装ppp协议. # dialer in-band 激活随叫随拨功能. # dialer idle-timeout 7200 # dialer map ip ABCD modem-script call broadcast 6225481 br 映射对应的拨号口.ABCD为对方拨号口的ip地址,6225481为对应的电话号码。 # dialer_group 1 定义拨号组成员. (3).配置防火墙 # dialer_list 1 pro ip permit 允许ip协议通过。 (4).配置连接口令 # user name ABCD pass XXXX ABCD为对方主机名,XXXX为连接口令. (5).配置拨号字符串
1.设置主机名/系统名 IOS:switch(config)# hostname "hostname" CLI:switch(enable) set system name name-string 2.设置登录口令 IOS:switch(config)# enable password level 1 password CLI:switch(enable) set password switch(enable) set enalbepass 3.设置远程访问 IOS:switch(config)# interface vlan 1 switch(config-if)# ip address ip-address netmask switch(config-if)# ip default-gateway ip-address CLI:switch(enable) set interface sc0 ip-address netmask broadcast-address switch(enable) set interface sc0 vlan switch(enable) set ip route default gateway 4.启用和浏览CDP信息 IOS:switch(config-if)# cdp enable switch(config-if)# no cdp enable CLI:switch(enable) set cdp {enable|disable} module/port 5.查看Cisco邻接设备的CDP通告 IOS:switch# show cdp interface [type modle/port] switch# show cdp neighbors [type module/port] [detail] CLI:switch(enable) show cdp neighbors[module/port] [vlan|duplex|capabilities|detail]
CISCO命令全集-思科命令汇总 各个视图模式介绍: 普通视图router> 特权视图router# /在普通模式下输入enable 全局视图router(config)# /在特权模式下输入config t 接口视图router(config-if)# /在全局模式下输入int 接口名称例如int s0或int e0 路由协议视图router(config-route)# /在全局模式下输入router 动态路由协议名称 1、基本配置: router>enable /进入特权模式 router#conf t /进入全局配置模式 router(config)# hostname xxx /设置设备名称就好像给我们的计算机起个名字 router(config)#enable password /设置特权口令 router(config)#no ip domain lookup /不允许路由器缺省使用DNS解析命令 router(config)# Service password-encrypt /对所有在路由器上输入的口令进行暗文加密 router(config)#line vty 0 4 /进入设置telnet服务模式 router(config-line)#password xxx /设置telnet的密码 router(config-line)#login /使能可以登陆 router(config)#line con 0 /进入控制口的服务模式 router(config-line)#password xxx /要设置console的密码 router(config-line)#login /使能可以登陆 2、接口配置: router(config)#int s0 /进入接口配置模式serial 0 端口配置(如果是模块化的路由器前面加上槽位编号,例如serial0/0 代表这个路由器的0槽位上的第一个接口)
思科交换机路由器命令大全 交换机命令: switch> 用户模式 1:进入特权模式 enable switch> enable switch# 2:进入全局配置模式 configure terminal switch> enable switch#configure terminal switch(conf)# 3:交换机命名 hostname aptech2950 以aptech2950为例 switch> enable switch#configure terminal switch(conf)#hostname aptch-2950 aptech2950(conf)# 4:配置使能口令 enable password cisco 以cisco为例 switch> enable switch#configure terminal switch(conf)#hostname aptch2950 aptech2950(conf)# enable password cisco 5:配置使能密码 enable secret ciscolab 以cicsolab为例--设置禁用IP地址解析特性,设置启用消息同步特性 switch> enable switch#configure terminal switch(conf)#hostname aptch2950 aptech2950(conf)# enable secret ciscolab aptech2950(conf)#no ip domain-lookup -----设置禁用IP 地址解析特性 aptech2950(conf)#logging synchronous -----设置启用消息同步特性 aptech2950(conf)#interface range fastethernet0/1-20
思科常用命令大全 1用户模式 2:特权模式 enable show vlan show version show interface show mac-address-table show running-config copy running-config startup-config 3:全局配置模式 config terminal hostname enable password ip default-gateway 4:接口配置模式 interface 端口 switchport mode trunk 5:line模式 line console 0 第2章交换机的基本配置 1.配置主机 hostname 2.查看交换机的配置 show running-config 使能口令 enable password 加密保存的使能口令 enable secret 配置IP地址 interface vlan1 ip address no shutdown 配置交换机的网关 ip default-gateway ipaddress 查看交换机的MAC地址表show mac-address-table 使用CDP协议 show cdp show cdp interface
show cdp neighbors show cdp neighbors detail show cdp traffic 保存与删除交换机配置 copy running-config startup-config 第三章:虚拟局域网(VLAN) VLAN的概述 VLAN是对连接在第2层交换机端口的网络用户的逻辑分段。 VLAN的作用: 1。广播控制 2。安全(副产品) 3。带宽利用 4。延迟 VLAN的种类 静态:基于端口的VLAN 动态:基于MAC地址的VLAN 在交换机上配置静态VLAN 创建VLAN 1。CONFIG TERMINAL VLAN 2 NAME 2 2。特权模式下 VLAN DATABASE VLAN 2 NAME 2 查看VLAN SHOW VLAN 删除VLAN NO VLAN 2 验证:SHOW VLAN BRIEF 在VLAN中添加端口 INTERFACE F0/2 INTERFACE RANGE F0/2 - 5 SWITCHPORT MODE ACCESS SWITCHPORT ACCESS VLAN 2
思科交换机命令大全 1.设置主机名/系统名 IOS:switch(config)# hostname "hostname" CLI:switch(enable) set system name name-string 2.设置登录口令 IOS:switch(config)# enable password level 1 password CLI:switch(enable) set password switch(enable) set enalbepass 3.设置远程访问 IOS:switch(config)# interface vlan 1 switch(config-if)# ip address ip-address netmask switch(config-if)# ip default-gateway ip-address CLI:switch(enable) set interface sc0 ip-address netmask broadcast-address switch(enable) set interface sc0 vlan switch(enable) set ip route default gateway 4.启用和浏览CDP信息 IOS:switch(config-if)# cdp enable switch(config-if)# no cdp enable CLI:switch(enable) set cdp {enable|disable} module/port 5.查看Cisco邻接设备的CDP通告 IOS:switch# show cdp interface [type modle/port] switch# show cdp neighbors [type module/port] [detail] CLI:switch(enable) show cdp neighbors[module/port] [vlan|duplex|capabilities|detail] 6.端口描述IOS:switch(config-if)#description escription-string CLI:switch(enable)set port name module/number description-string 7.设置端口速度 IOS:switch(config-if)# speed{10|100|auto} CLI:switch(enable) set port speed moudle/number {10|100|auto} switch(enable) set port speed moudle/number {4|16|auto} 8.设置以太网的链路模式 IOS:switch(config-if)# duplex {auto|full|half} CLI:switch(enable) set port duplex module/number {full|half} 9.配置静态VLAN IOS:switch# vlan database switch(vlan)# vlan vlan-num name vla switch(vlan)# exit switch# configure teriminal switch(config)#interface interface module/number switch(config-if)# switchport mode access switch(config-if)# switchport access vlan vlan-num switch(config-if)# end CLI:switch(enable) set vlan vlan-num [name name] switch(enable) set vlan vlan-num mod-num/port-list 10.配置VLAN中继线
1. 交换机支持的命令: 交换机基本状态: switch: ;ROM状态,路由器是rommon> hostname> ;用户模式 hostname# ;特权模式 hostname(config)# ;全局配置模式 hostname(config-if)# ;接口状态 交换机口令设置: switch>enable ;进入特权模式 switch#config terminal ;进入全局配置模式 switch(config)#hostname ;设置交换机的主机名 switch(config)#enable secret xxx ;设置特权加密口令 switch(config)#enable password xxa ;设置特权非密口令 switch(config)#line console 0 ;进入控制台口 switch(config-line)#line vty 0 4 ;进入虚拟终端 switch(config-line)#login ;允许登录 switch(config-line)#password xx ;设置登录口令xx switch#exit ;返回命令 交换机VLAN设置: switch#vlan database ;进入VLAN设置 switch(vlan)#vlan 2 ;建VLAN 2 switch(vlan)#no vlan 2 ;删vlan 2 switch(config)#int f0/1 ;进入端口1 switch(config-if)#switchport access vlan 2 ;当前端口加入 vlan 2 switch(config-if)#switchport mode trunk ;设置为干线 switch(config-if)#switchport trunk allowed vlan 1,2 ;设 置允许的vlan switch(config-if)#switchport trunk encap dot1q ;设置vlan
Cisco清除配置使用:erase startup-config(删除NVRAM中的内容),然后重启路由器reload; 华为清除配置使用:reset saved-configuration,重启路由器reboot; ctrl+b(backward) 光标左移一个字符 ctrl+f(foreward) 光标右移一个字符 ctrl+a(a是?????) 光标移到命令开头 ctrl+e(end) 光标移到命令末端 esc+b (backward) 光标左移一个词 esc+f (foreward) 光标右移一个词 ctrl+z一次性退出特权模式Router#关于模式:用户模式(user execution mode),特权模式(privilege execution mode),全局配置模式(global configuration mode),以及在全局配置模式下的具体配置模式(如路由接口配置模式,路由子接口配置模式,路由协议配置模式,line配置模式等)模式的转换:连接路由后首先进入的是用户模式,特征是有符号">",用户模式只能查找路由的配置和状态,不能配置路由,需要配置路由必须进入特权模式,进入特权模式的命令是:enable 若有密码,需要正确密码才能进入,进入特权模式,其特征是有符号"#".从特权模式进入路由全局配置模式命令是:configure terminal 从全局配置模式进入各个具体配置模式的命令如下: 特权模式--->路由接口配置模式 interface serial??(串口) interface ethernet??(以太网口) 特权模式--->路由子接口配置模式
思科交换机常用命令大全 1.1 用户模式与特权模式 用户模式:可以使用一些基本的查询命令 特权模式:可以对交换机进行相关的配置 进入特权模式命令:Switch>enable 退出特权模式命令:Switch#exit 启用命令查询: 时间设置:Switch#clock set 时间(自选参数,参数必须符合交换机要求) 显示信息命令:Switch#show 可选参数 注意:可以用TAB键补齐命令,自选参数为用户自定义参数,可选参数为交换机设定参数 查看交换机配置: Switch#show running-config 保存交换机配置:Switch#copy running-config startup-config Switch#wr 查看端口信息:Switch#show interface 查看MAC地址表:Switch#show mac-address-table 查看交换机CPU的状态信息:Switch#show processes 1.2 全局配置模式 进入全局配置模式:Switch#configure terminal 主机名修改:Switch(config)#hostname 主机名(自选参数) 特权模式进入密码: Switch(config)#enable secret 密码(自选参数) 取消特权模式密码:Switch(config)#no enable secret
取消主机名设置: Switch(config)#no hostname 退出配置模式: Switch(config)#exit 需要特别注意的是在配置模式中无法使用show命令,如果要使用 的话show前必须加do和空格,例如:do show * 指定根交换机命令:Switch(config)#spanning-tree vlan 自选参数(VLAN号)root primary 例如: Switch(config)#spanning-tree vlan 1 root primary 需要注意的是:设置根交换机是基于VLAN的 关闭生成树协议命令:Switch(config)#no spanning-tree vlan 自选参数(VLAN 号) 例如: Switch(config)#no spanning-tree vlan 1 1.3 接口配置模式 进入接口配置模式:Switch(config)#interface 端口名称(可选参数) 启用端口:Switch(config-if)#no shutdown 停用端口:Switch(config-if)#shutdown 进入同种类型多端口配置:Switch(config)# interface range fastethernet 0/1-5 进入不同类型多端口配置:Switch(config)#interface range fastethernet 0/1-5,gigabitethernet 0/1-2 退出接口配置模式:Switch(config-if)#exit 1.4 二层端口的配置 端口速率: Switch(config-if)#speed 可选参数 双工模式: Switch(config-if)#duplex 可选参数 禁用链路协商:Switch(config-if)#no negotiation auto 启用链路协商:Switch(config-if)#negotiation auto
CCNA命令大全 登录网络设备,USB-COM-COM-RJ45,超级终端/SecureCRT Would you like to enter the initial configuration dialog? [yes/no]: //回答no,如果回答了yes,会出现大量对话,Ctrl+C中断对话 % Please answer 'yes' or 'no'. Router> //用户模式,只能简单的show及ping/tracer Router>enable //从用户模式进入特权模式 Router# //特权模式,能够进行所有的show及ping/tracer Router#configure terminal//从特权模式进入全局配置模式 Router(config)# //全局配置模式,可以进行相关配置 Router(config)#hostname R1//给设备命名 R1#show version //查看设备软硬件版本信息,开机时间,内存和Flash大小,模块等 R1#show ip interface brief //查看接口信息 R1#show running-config //查看运行在内存中的当前配置 R1#show startup-config //查看开机配置,保存在NVRAM R1#copy running-config startup-config //将当前运行配置保存到开机配置中 R1#show tech-support //查看设备所有软硬件的详细信息 R1(config)#enable password xxx//配置enable密码,该密码show run可见 R1(config)#enable secret xxx //配置enable密码,该密码show run不可见,两个同时配置时,secret密码生效 R1(config)#line vty 0 4 //进入telnet配置模式 R1(config-line)#login //telnet登陆需要密码验证
思科交换机配置命令大全 switch> 用户模式 1:进入特权模式 enable switch> enable switch# 2:进入全局配置模式 configure terminal switch> enable switch#configure terminal switch(conf)# 3:交换机命名 hostname aptech2950 以aptech2950为例 switch> enable switch#configure terminal switch(conf)#hostname aptch-2950 aptech2950(conf)# 4:配置使能口令 enable password cisco 以cisco为例 switch> enable switch#configure terminal switch(conf)#hostname aptch2950 aptech2950(conf)# enable password cisco 5:配置使能密码 enable secret ciscolab 以cicsolab为例 switch> enable switch#configure terminal switch(conf)#hostname aptch2950 aptech2950(conf)# enable secret ciscolab 6:设置虚拟局域网vlan 1 interface vlan 1 switch> enable switch#configure terminal switch(conf)#hostname aptch2950 aptech2950(conf)# interface vlan 1 aptech2950(conf-if)#ip address 192.168.1.1 255.255.255.0 配置交换机端口ip 和子网掩码 aptech2950(conf-if)#no shut 是配置处于运行中aptech2950(conf-if)#exit aptech2950(conf)#ip default-gateway 192.168.254 设置网关地址 7:进入交换机某一端口 interface fastehernet 0/17 以17端口为例switch> enable switch#configure terminal
思科命令大全 Access-enable 允许路由器在动态访问列表中创建临时访问列表入口Access-group 把访问控制列表(ACL)应用到接口上 Access-list 定义一个标准的IP ACL Access-template 在连接的路由器上手动替换临时访问列表入口 Appn 向APPN子系统发送命令 Atmsig 执行ATM信令命令 B 手动引导操作系统 Bandwidth 设置接口的带宽 Banner motd 指定日期信息标语 Bfe 设置突发事件手册模式 Boot system 指定路由器启动时加载的系统映像 Calendar 设置硬件日历 Cd 更改路径 Cdp enable 允许接口运行CDP协议 Clear 复位功能 Clear counters 清除接口计数器 Clear interface 重新启动接口上的件逻辑 Clockrate 设置串口硬件连接的时钟速率,如网络接口模块和接口处理器能接受的速率 Cmt 开启/关闭FDDI连接管理功能 Config-register 修改配置寄存器设置 Configure 允许进入存在的配置模式,在中心站点上维护并保存配置信息 Configure memory 从NVRAM加载配置信息 Configure terminal 从终端进行手动配置 Connect 打开一个终端连接 Copy 复制配置或映像数据 Copy flash tftp 备份系统映像文件到TFTP服务器 Copy running-config startup-config 将RAM中的当前配置存储到NVRAM Copy running-config tftp 将RAM中的当前配置存储到网络TFTP服务器上Copy tftp flash 从TFTP服务器上下载新映像到Flash Copy tftp running-config 从TFTP服务器上下载配置文件 Debug 使用调试功能 Debug dialer 显示接口在拨什么号及诸如此类的信息 Debug ip rip 显示RIP路由选择更新数据
思科路由器命令大全完整 版 Modified by JEEP on December 26th, 2020.
思科交换机路由器命令大全交换机命令: switch> 用户模式 1:进入特权模式 enable switch> enable switch# 2:进入全局配置模式 configure terminal switch> enable switch#configure terminal switch(conf)# 3:交换机命名 hostname aptech2950 以aptech2950为例 switch> enable switch#configure terminal switch(conf)#hostname aptch-2950 aptech2950(conf)# 4:配置使能口令 enable password cisco 以cisco为例 switch> enable switch#configure terminal switch(conf)#hostname aptch2950 aptech2950(conf)# enable password cisco 5:配置使能密码 enable secret ciscolab 以cicsolab为例--设置禁用IP地址解析特性,设置启用消息同步特性 switch> enable switch#configure terminal switch(conf)#hostname aptch2950 aptech2950(conf)# enable secret ciscolab
aptech2950(conf)#no ip domain-lookup -----设置禁用IP地址解析特性 aptech2950(conf)#logging synchronous -----设置启用消息同步特性 aptech2950(conf)#interface range fastethernet0/1-20 aptech2950(conf-if-range)#spanning-tree portfast -----设置快速 端口 aptech2950(conf)#interface range fastethernet 0/23-24 aptech2950(conf-if-range)#swichport mode trunk -----设置主干道端口 aptech2950(conf)#spanning-tree uplingkfast ---设置阻塞启用迅速(只可以在访问层启用) 6:设置虚拟局域网vlan 1 interface vlan 1 switch> enable switch#configure terminal switch(conf)#hostname aptch2950 aptech2950(conf)# interface vlan 1 配置交换机端口ip和子网掩码 aptech2950(conf-if)#no shut 是配置处于运行中 aptech2950(conf-if)#exit 设置网关地址 7:进入交换机某一端口 interface fastehernet 0/17 以17端口为例 switch> enable switch#configure terminal switch(conf)#hostname aptch2950 aptech2950(conf)# interface fastehernet 0/17 aptech2950(conf-if)# 8:查看命令 show switch> enable switch# show version 察看系统中的所有版本信息
思科交换机配置命令大全 switch>用户模式1:进入特权模式enableswitch>enableswitch# 2:进入全局配置模式configureterminalswitch>enable switch#configureterminalswitch(conf)# 3:交换机命名hostnameaptech2950以aptech2950为例 switch>enable switch#configureterminal switch(conf)#hostnameaptch-2950aptech2950(conf)# 4:配置使能口令enablepasswordcisco以cisco为例 switch>enable switch#configureterminal switch(conf)#hostnameaptch2950 aptech2950(conf)#enablepasswordcisco5:配置使能密码enablesecretciscolab以cicsolab为例switch>enable switch#configureterminal switch(conf)#hostnameaptch2950 aptech2950(conf)#enablesecretciscolab 6:设置虚拟局域网vlan1interfacevlan1switch>enable switch#configureterminal switch(conf)#hostnameaptch2950aptech2950(conf)#interfacevlan1 aptech2950(conf-if)#ipaddress192.168.1.1255.255.255.0配置交换机端口ip和子网掩码aptech2950(conf-if)#noshut是配置处于运行中aptech2950(conf-if)#exit aptech2950(conf)#ipdefault-gateway192.168.254设置网关地址7:进入交换机某一端口interfacefastehernet0/17以17端口为例 switch>enable switch#configureterminal switch(conf)#hostname aptch2950 aptech2950(conf)# interface fastehernet 0/17 aptech2950(conf-if)# 8:查看命令 show switch> enable switch# show version 察看系统中的所有版本信息 show interface vlan 1 查看交换机有关ip 协议的配置信息 show running-configure 查看交换机当前起作用的配置信息 show interface fastethernet 0/1 察看交换机1接口具体配置和统计信息 show mac-address-table 查看mac地址表 show mac-address-table aging-time 查看mac地址表自动老化时间 9:交换机恢复出厂默认恢复命令 switch> enable switch# erase startup-configure switch# reload 10:双工模式设置 switch> enable switch#c onfigure terminal switch2950(conf)#hostname aptch-2950 aptech2950(conf)# interface fastehernet 0/17 以17端口为例 aptech2950(conf-if)#duplex full/half/auto 有full , half, auto 三个可选项 11:cdp相关命令 switch> enable switch# show cdp 查看设备的cdp全局配置信息